
Optimized RV Wash Setup: Steps, Equipment, and Supplies
We’ve refined our RV wash setup to make the washing process more efficient, from the pre-rinse through the spot-free final rinse. Here’s how we use it, how the water flows through the system, and the equipment we use.
Watch the Full Wash Walkthrough
See how we use this RV wash setup, from the pre-rinse through the Spot-Free Final Rinse.
The CR Spotless Water System is only used during the final rinse. Learn more about how we use it during the final rinse.
Why This Setup Works
✓ Conserves CR Spotless resin by using deionized water only for the final rinse.
✓ Keeps everything connected so we can move the setup from section to section around the RV without disconnecting and reconnecting hoses.
✓ Helps us skip drying the RV with towels by using deionized water during the spot-free final rinse.
Our RV Wash Setup
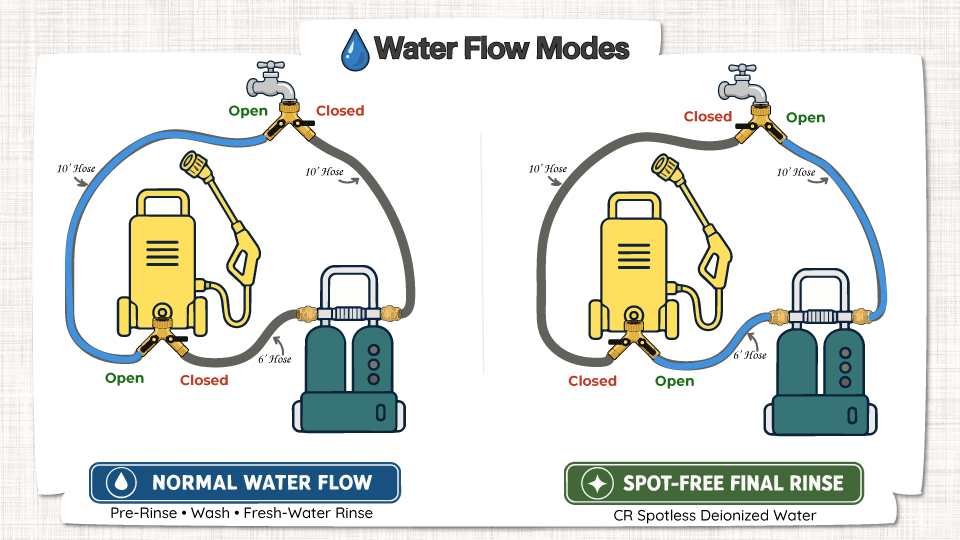
This diagram shows how water flows through our RV wash setup during the first three steps (pre-rinse, wash, fresh-water rinse), then how the valve positions change for the spot-free final rinse.
Our Wash Process
Since our RV is large, we typically wash it in four sections: the cab/front, one side, the rear, and the other side. We complete all four wash steps on one section before moving to the next. For each section, we begin in Normal Water Flow mode for the pre-rinse, washing, and fresh-water rinse. We then change the splitter valve positions to Spot-Free Final Rinse mode for the final rinse. Once that section is complete, we move the entire connected setup to the next area and repeat the process. Because the hoses remain connected, we only need to reposition the equipment and turn the splitter handles to change the water flow.
Pre-Rinse
We begin by positioning the wash setup next to the first section of the RV and setting the splitter valves to Normal Water Flow mode. This bypasses the CR Spotless system during the pre-rinse, helping conserve the deionizing resin for the final rinse.
Starting at the top, we rinse that section to remove loose dirt, dust, bugs, and other debris before washing. Once the pre-rinse is complete, we move directly to washing that same section.
Wash
With the valves still set to Normal Water Flow mode, we use the pressure washer’s built-in soap reservoir to apply RV wash soap to the section we are working on. We wash that section from the top down, using a wider spray pattern and avoiding excessive pressure. Once the section has been washed, we move directly to Step 3 without moving the equipment to another part of the RV.
Fresh-Water Rinse
With the splitter valves still set to Normal Water Flow mode, we thoroughly rinse away the soap from the same section of the RV. Since the CR Spotless system is still bypassed during this step, deionized water is only used where it provides the most benefit. Once the soap has been completely rinsed away, we’re ready to switch to the final rinse.
Spot-Free Final Rinse
We change the splitter valve positions to Spot-Free Final Rinse mode, routing the water through the CR Spotless system for the final rinse on that same section. Using deionized water for this final step helps prevent water spots, so we can simply let the RV air dry without hand drying or wiping it down with towels.
Once the section is complete, we move the entire connected wash setup to the next section of the RV and repeat all four steps. Because the hoses stay connected throughout the process, changing sections only requires repositioning the equipment and turning the splitter handles to the appropriate water flow mode.
As an Amazon Associate, we earn from qualifying purchases at no extra cost to you.
Equipment and Supplies
These are the primary components we use in our RV wash setup. Where a product is no longer available, we’ve included a comparable replacement that offers similar functionality.
Pressure Washer
We use a discontinued 3100 PSI Ryobi gas pressure washer in this setup. Since it’s no longer available, this comparable gas model offers similar cleaning performance, a built-in soap tank, and the features needed to follow the same washing process.

High-Foam Wash Soap
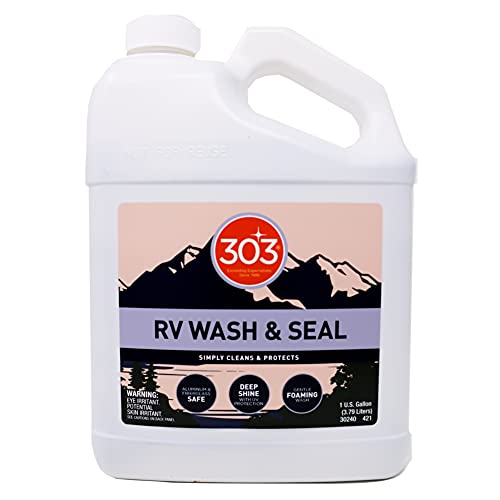
This is the high-foam wash we add to our pressure washer’s soap reservoir to clean the RV, followed by a fresh-water rinse before the final spot-free rinse.
CR Spot-Free Water System
This is the deionized water system we use for our final rinse. We don’t use it during the wash process, which helps conserve resin while still giving us a spot-free finish.

Brass Hose Splitters
(2 Required)
Install one splitter at the hose spigot and the second directly on the pressure washer. Together they create a simple bypass that makes it easy to switch to deionized water only for the final rinse while helping conserve CR Spotless resin.

Water Supply Lines From the Water Source
(2 Required, or 3 if You Need a Water Supply Hose)
Two 10-foot leader hoses connect the water source to the pressure washer and the CR Spotless system, creating separate water supply lines for each. If you don’t already have a garden hose to connect to your water supply, you’ll need one additional hose (3 total). This added hose also provides the extra reach needed to move the entire wash setup around the RV as you work from section to section.

CR Spotless to Pressure Washer Line
(1 Required)
This 6-foot leader hose connects the CR Spotless system directly to the pressure washer, carrying deionized water to the pressure washer during the spot-free final rinse. The shorter length helps keep the setup compact as we move around the RV.

Brass Male-to-Male Adapters
(1 Pack Required)
These brass male-to-male adapters install on the CR Spotless inlet and outlet ports, allowing the stainless leader hoses to connect securely to the system.
